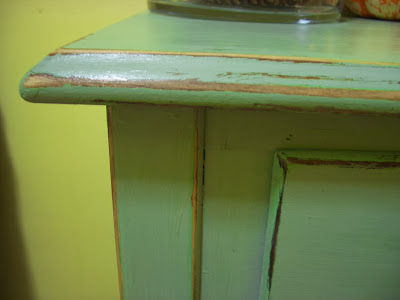
We've all heard of recycling, which is good for the environment, but how about upcycling?
Upcycling is when you take something old, ugly and/or damaged and make it into something new, interesting, cool, beautiful and functional. It's basically giving something old a makeover so that it has more value than it did before. Great concept, right?
I love decorating my home and collecting interesting and beautiful pieces to make my living space more comfortable. Buying furniture and good quality decor can be fun, but it can also be very costly. I have been building my living room, one piece at a time, with used and vintage furniture that has good structure, but needs a bit of help.
My first project for home decor is upcycling a console table. After some research, I decided to refurbish my table and give it a distressed look. I chose this style because I like the rustic chic look. It reminds me of the Autumn I spent living in the mountains of rural Vermont, doing organic gardening and getting to cook and eat freshly grown food each day. I also love having one of a kind, unique pieces of furniture and this project will turn my table into just that!
I got my wooden console table from Craigslist for $20. It is originally from Bombay Company, which I think is good quality and probably retailed for $150-200. http://www.bombaycompany.com/furniture-store/hall-console-tables
Here is my table's before picture.
I wanted a cool piece of artwork to go with the table, so I got a photo that I took from gathering flowers in the organic Vermont garden and turned it into a vibrant piece of art by getting an inexpensive "photo-to-canvas" Groupon. Once my picture was turned into a photo on canvas, I hung it up and tried to find a pretty color of green paint to match some of the green in my photo. Home Depot had a great low-VOC paint and I found my color!
I gathered all of my supplies from Home Depot. I think this was seriously my first time going in there by myself, and I obviously had no idea what I was doing, but I found someone to help me.
I bought:
a few sheets of 60 coarse grit sandpaper
tack cloth
2 medium sized paint brushes
a 30 oz. container of light green paint
polyacrylic protective finish
Once I gathered my supplies, I got to work. I took guidance primarily from
http://upcycledtreasures.com/2013/06/beach-inspired-console-table/
http://www.hgtv.com/handmade/how-to-distress-furniture/index.html
http://www.youtube.com/watch?v=tEYRjltR0jM
First I detached the drawer handles and took out the drawers. I then sanded the entire piece of furniture by hand. Make sure you have enough sandpaper if you have a large piece. Here is the table top after sanding:
Once I sanded everything, I painted the whole table and drawer fronts with one coat of paint. I then let it dry and did a second coat of paint.
After sanding, I painted the table with one coat of polyacrylic protective finish and let it dry.
And here is the finished piece! Since it's Autumn, I decorated my table with some pinecones and mini tiger pumpkins. I also have a key dish on the table and a basket under the table to hold my rain boots and umbrellas.


No comments:
Post a Comment